Raspberry Pi 4B Setup 1 - Installing Raspberry Pi OS
This post provides instructions installing Raspberry Pi OS on the Raspberry Pi 4 Model B.
This document is based on:
- Windows 10 Home (22H2)
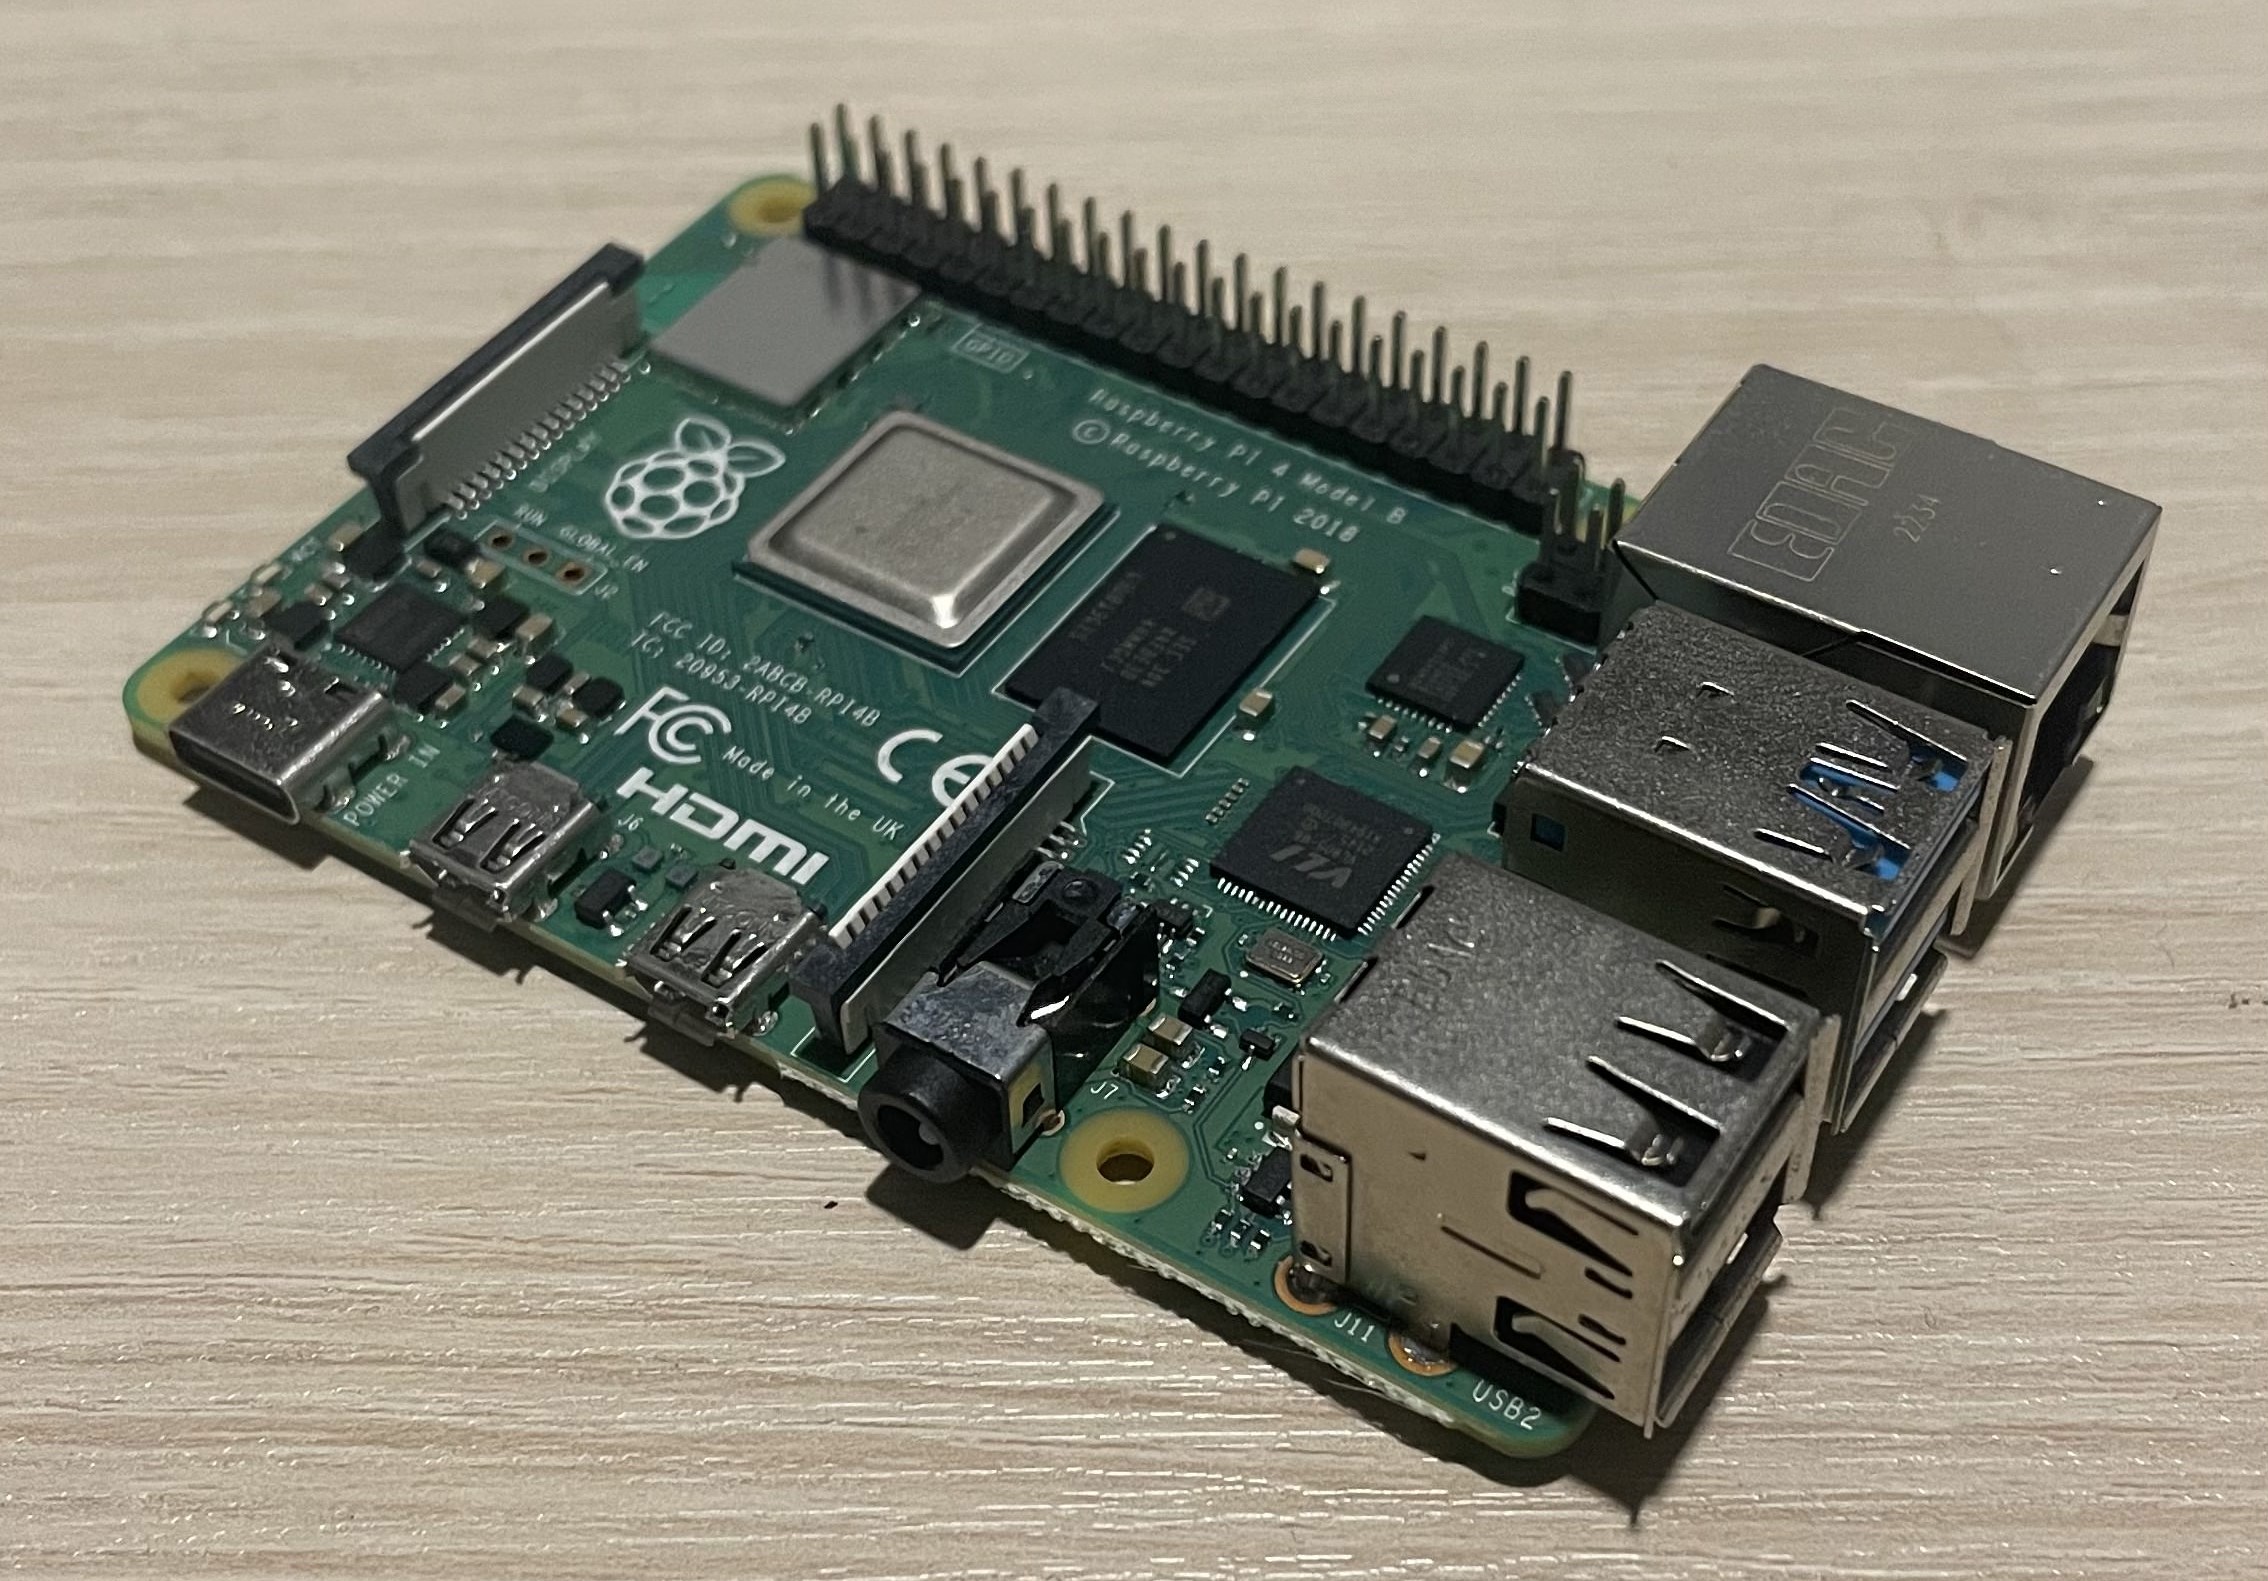
- Raspberry Pi 4 Model B 4GB
- Samsung Evo 32GB microSD Card
- Raspberry Pi Imager v1.8.5
Introduction
This guide provides step-by-step instructions to set up a Raspberry Pi 4 Model B with Raspberry Pi OS. It covers microSD card preparation, formatting, and using the Raspberry Pi Imager tool. The post emphasizes troubleshooting SD card reading and formatting issues. It is the first of two posts aimed at enabling gadget mode on your Raspberry Pi. Customization tips for SSH and network setup are included to streamline the process for both beginners and advanced users.
1. Prepare a microSD card
1.1. Check specifications
A microSD card should be at least 8GB or larger to operate the Raspberry Pi 4B.
According to the official documentation, 32GB is the recommended size for the current version of Raspbian OS, while 16GB is recommended for Raspbian OS Lite. The maximum capacity of the SD card is 2TB.
| Operating System | Minimum | Recommended |
|---|---|---|
| Raspberry Pi OS | 8GB | 32GB |
| Raspberry Pi OS Lite | 8GB | 16GB |
1.2. Prepare the SD card reader and read the SD card
 A MicroSD Card and Its Reader
As shown in the picture, the reader has two slots for different SD card sizes.
I personally recommend using a reader with a dedicated microSD card slot for physical safety.
If you encounter issues reading the SD card on your computer, please go to Section E.1.
2. Set Up the Raspberry Pi Imager
2.1. Install the Raspberry Pi Imager
Download the Raspberry Pi Imager from the official site.
Raspberry Pi Imager: https://www.raspberrypi.com/software/
2.2. Format the microSD card to FAT32
 Raspberry Pi Imager formatter
Before the operating system is installed on the microSD card, the card must be cleaned and formatted into FAT32. FAT32 is a file system compatible with various operating systems. To format the card conveniently, the Raspberry Pi Imager has its own formatter. Follow the steps below to erase the contents of the card and format it to FAT32.
- Open Raspberry Pi Imager.
- Click “CHOOSE” under “Operating System” to scroll down and select “Erase”.
- Click “CHOOSE” under “Storage” to select the microSD card storage.
- Click “Next” to proceed formatting.
If you experience issues with formatting, please see Section E.2
2.3. Select the Raspberry Pi OS
There are various operating systems available depending on your purpose:
Default options:
- Raspberry Pi OS is the standard version with a Graphical UI and basic applications. This is recommended for beginners.
“Raspberry Pi OS (other)” options:
- Raspberry Pi OS Lite is a lightweight version with a Terminal-based UI.
- Raspberry Pi OS Full includes a Graphical UI and additional recommended applications.
“Other general-purpose OS” options:
- Ubuntu Desktop is a Linux-based OS with a Graphical UI.
- Ubuntu Server offers a Terminal-based UI.
Brief comparisons between Raspberry Pi OS standard versions and Raspberry Pi OS legacy versions:
- Standard versions use the latest Linux kernel (6.x series), which includes new features and offers better computing performances. These versions are recommended for Raspberry Pi 5 as a personal computer or a media hub.
- Legacy versions use the Linux 5.10 LTS kernel, which offers better stability and compatibility with hardware or custom overlays. Note that the legacy OS versions are not available for Raspberry Pi 5 models.
| Scenario | Recommended OS Version |
|---|---|
| New projects using latest hardware (e.g., Pi 5) | Standard Raspberry Pi OS |
| Projects using GPIO, camera module, or custom overlays | Legacy Raspberry Pi OS |
| Running modern GUI applications (Wayland support) | Standard Raspberry Pi OS |
| Replicating older projects or using legacy software | Legacy Raspberry Pi OS |
| Maximizing performance with recent kernel features | Standard Raspberry Pi OS |
Brief comparisons between 32-bit versions and 64-bit versions:
- 32-bit OS is recommended for legacy softwares with old libraries, supporting compatibility.
- 64-bit OS is recommended for modern software stacks like ROS2, TensorFlow, or OpenCV to maximize CPU performances. Most importantly, 64-bit OS is required to fully utilize 8GB of RAM.
| Factor | 32-bit OS | 64-bit OS |
|---|---|---|
| Performance | Lower (32-bit CPU mode) | Higher (64-bit CPU mode) |
| Memory Access | Up to 4 GB | Full access (up to 8 GB) |
| Software Compatibility | Better for older libs | Better for modern software |
| ROS 2 Support | Limited | Strong |
| Development Environment | More restrictive | More modern |
| Ideal Use Case | Legacy apps, simpler robots | CPU-intensive tasks, vision |
I personally selected Raspberry Pi OS (legacy, 64-bit) to easily set the Raspberry Pi device in a ‘gadget mode,’ which will be discussed in the next post.
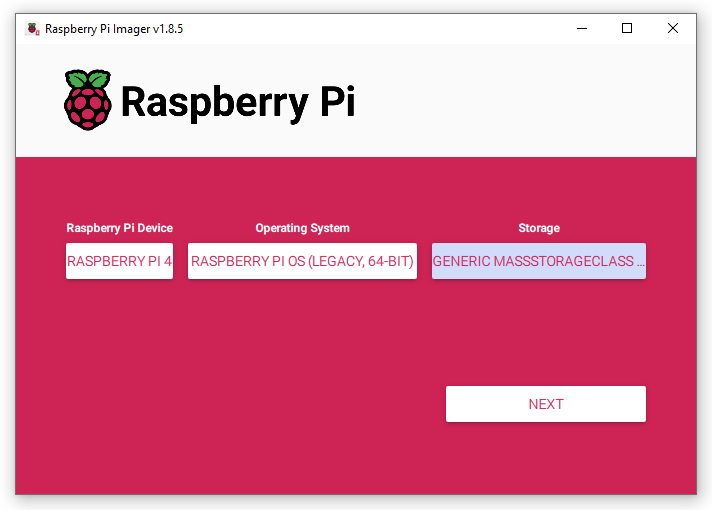 Raspberry Pi Imager main page
2.3. Configure the settings
When the OS customization prompt appears, you can edit settings such as username, password, WiFi, locale, SSH, etc. To connect the Raspberry Pi remotely using SSH, follow the steps below after selecting “edit settings”; otherwise, click “No” to skip customization.
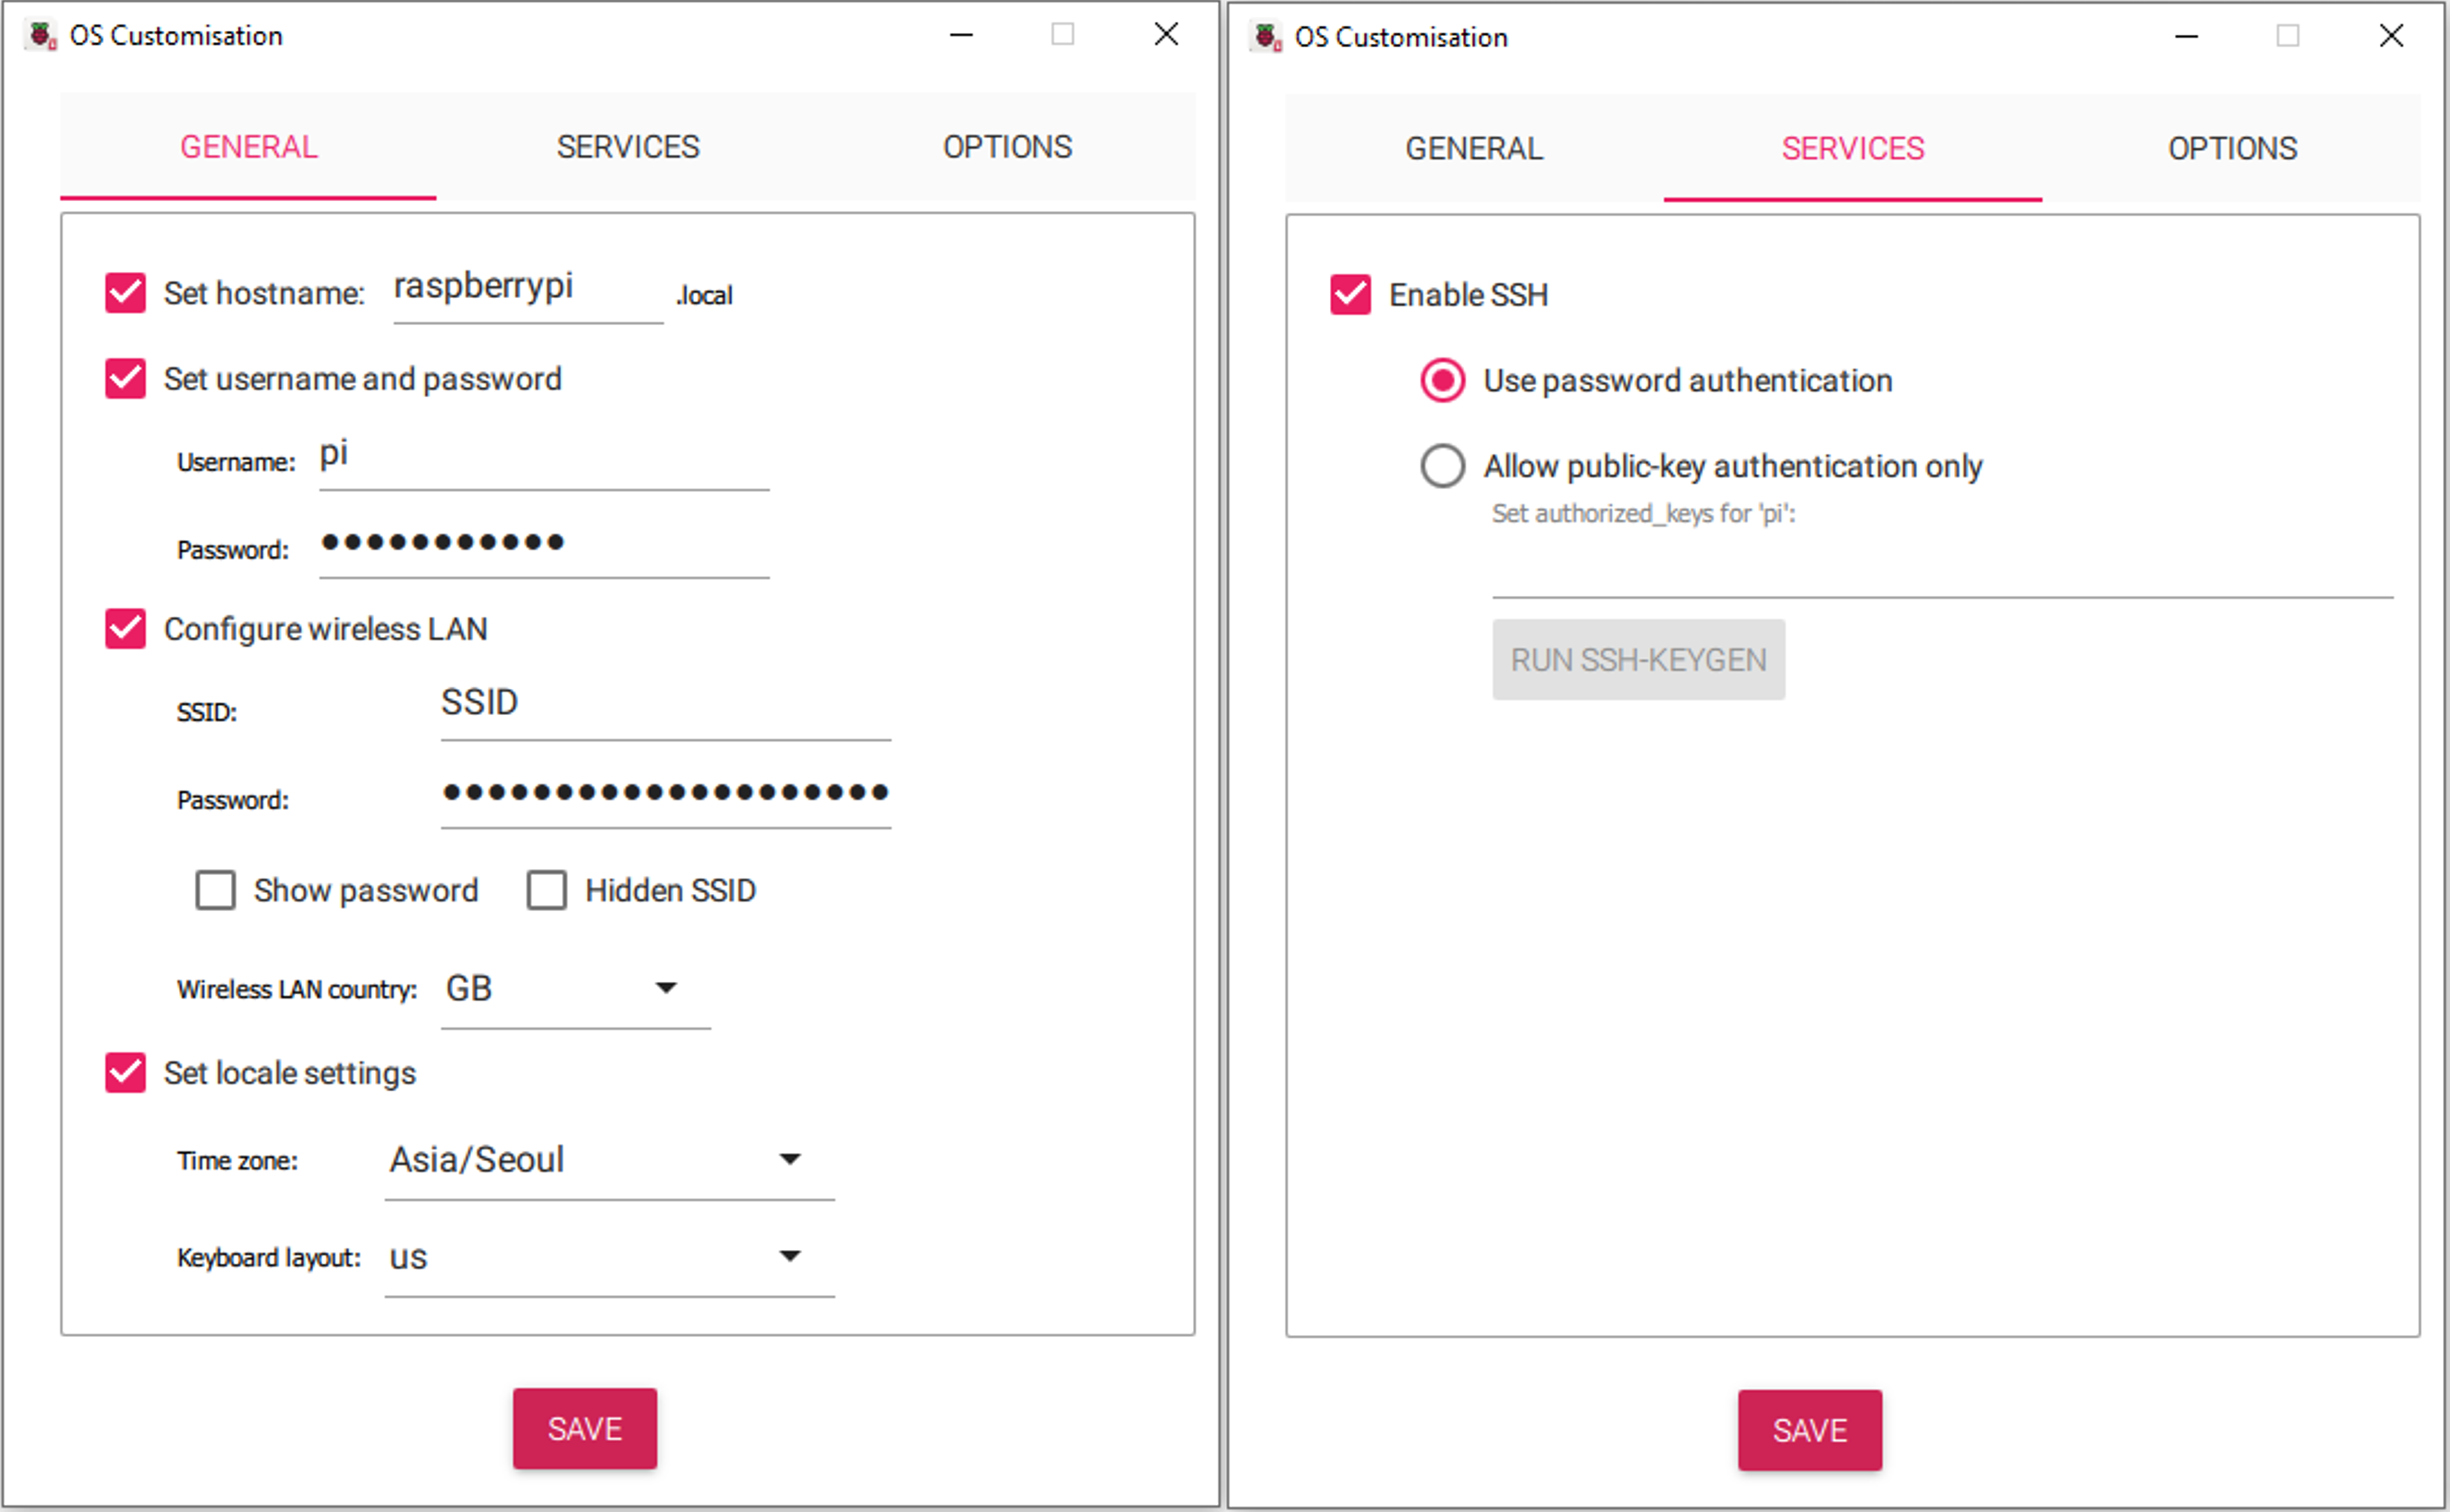 Enabling SSH from configurations on the imager
- This configuration enables SSH via the address
pi@raspberrypi.local. To enable SSH, the username and password must be set.
Configure the device to connect to a 2.4GHz Wi-Fi network, as it cannot connect to a 5GHz Wi-Fi network initially. Additional configurations are required after logging into the device to connect to a 5GHz Wi-Fi network.
E. Error Notes
E.1. Unable to read the microSD card on your computer
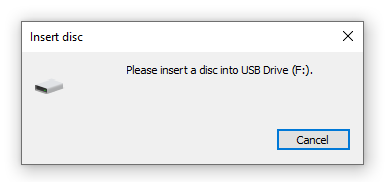 Prompt when SD card has a reading error
Sometimes, the microSD card drive won’t be recognized as shown above. Follow these steps to troubleshoot:
- Check for physical damage to the microSD card, SD card mount, slot, or USB extension if used.
If using an SD card adapter in the SD card slot, try directly inserting the microSD card into its dedicated slot.
- Check if the microSD card is over 32GB. Windows 10 has issues with microSD cards larger than 32GB.
- Check if the microSD card appears in Disk Management.
- Right-click the Windows logo, then find Disk Management.
- Type
Create and format hard disk partitionsorDisk Managementin the search bar. If the drive is recognized but labeled “Unallocated,” refer to Section E.2.3.
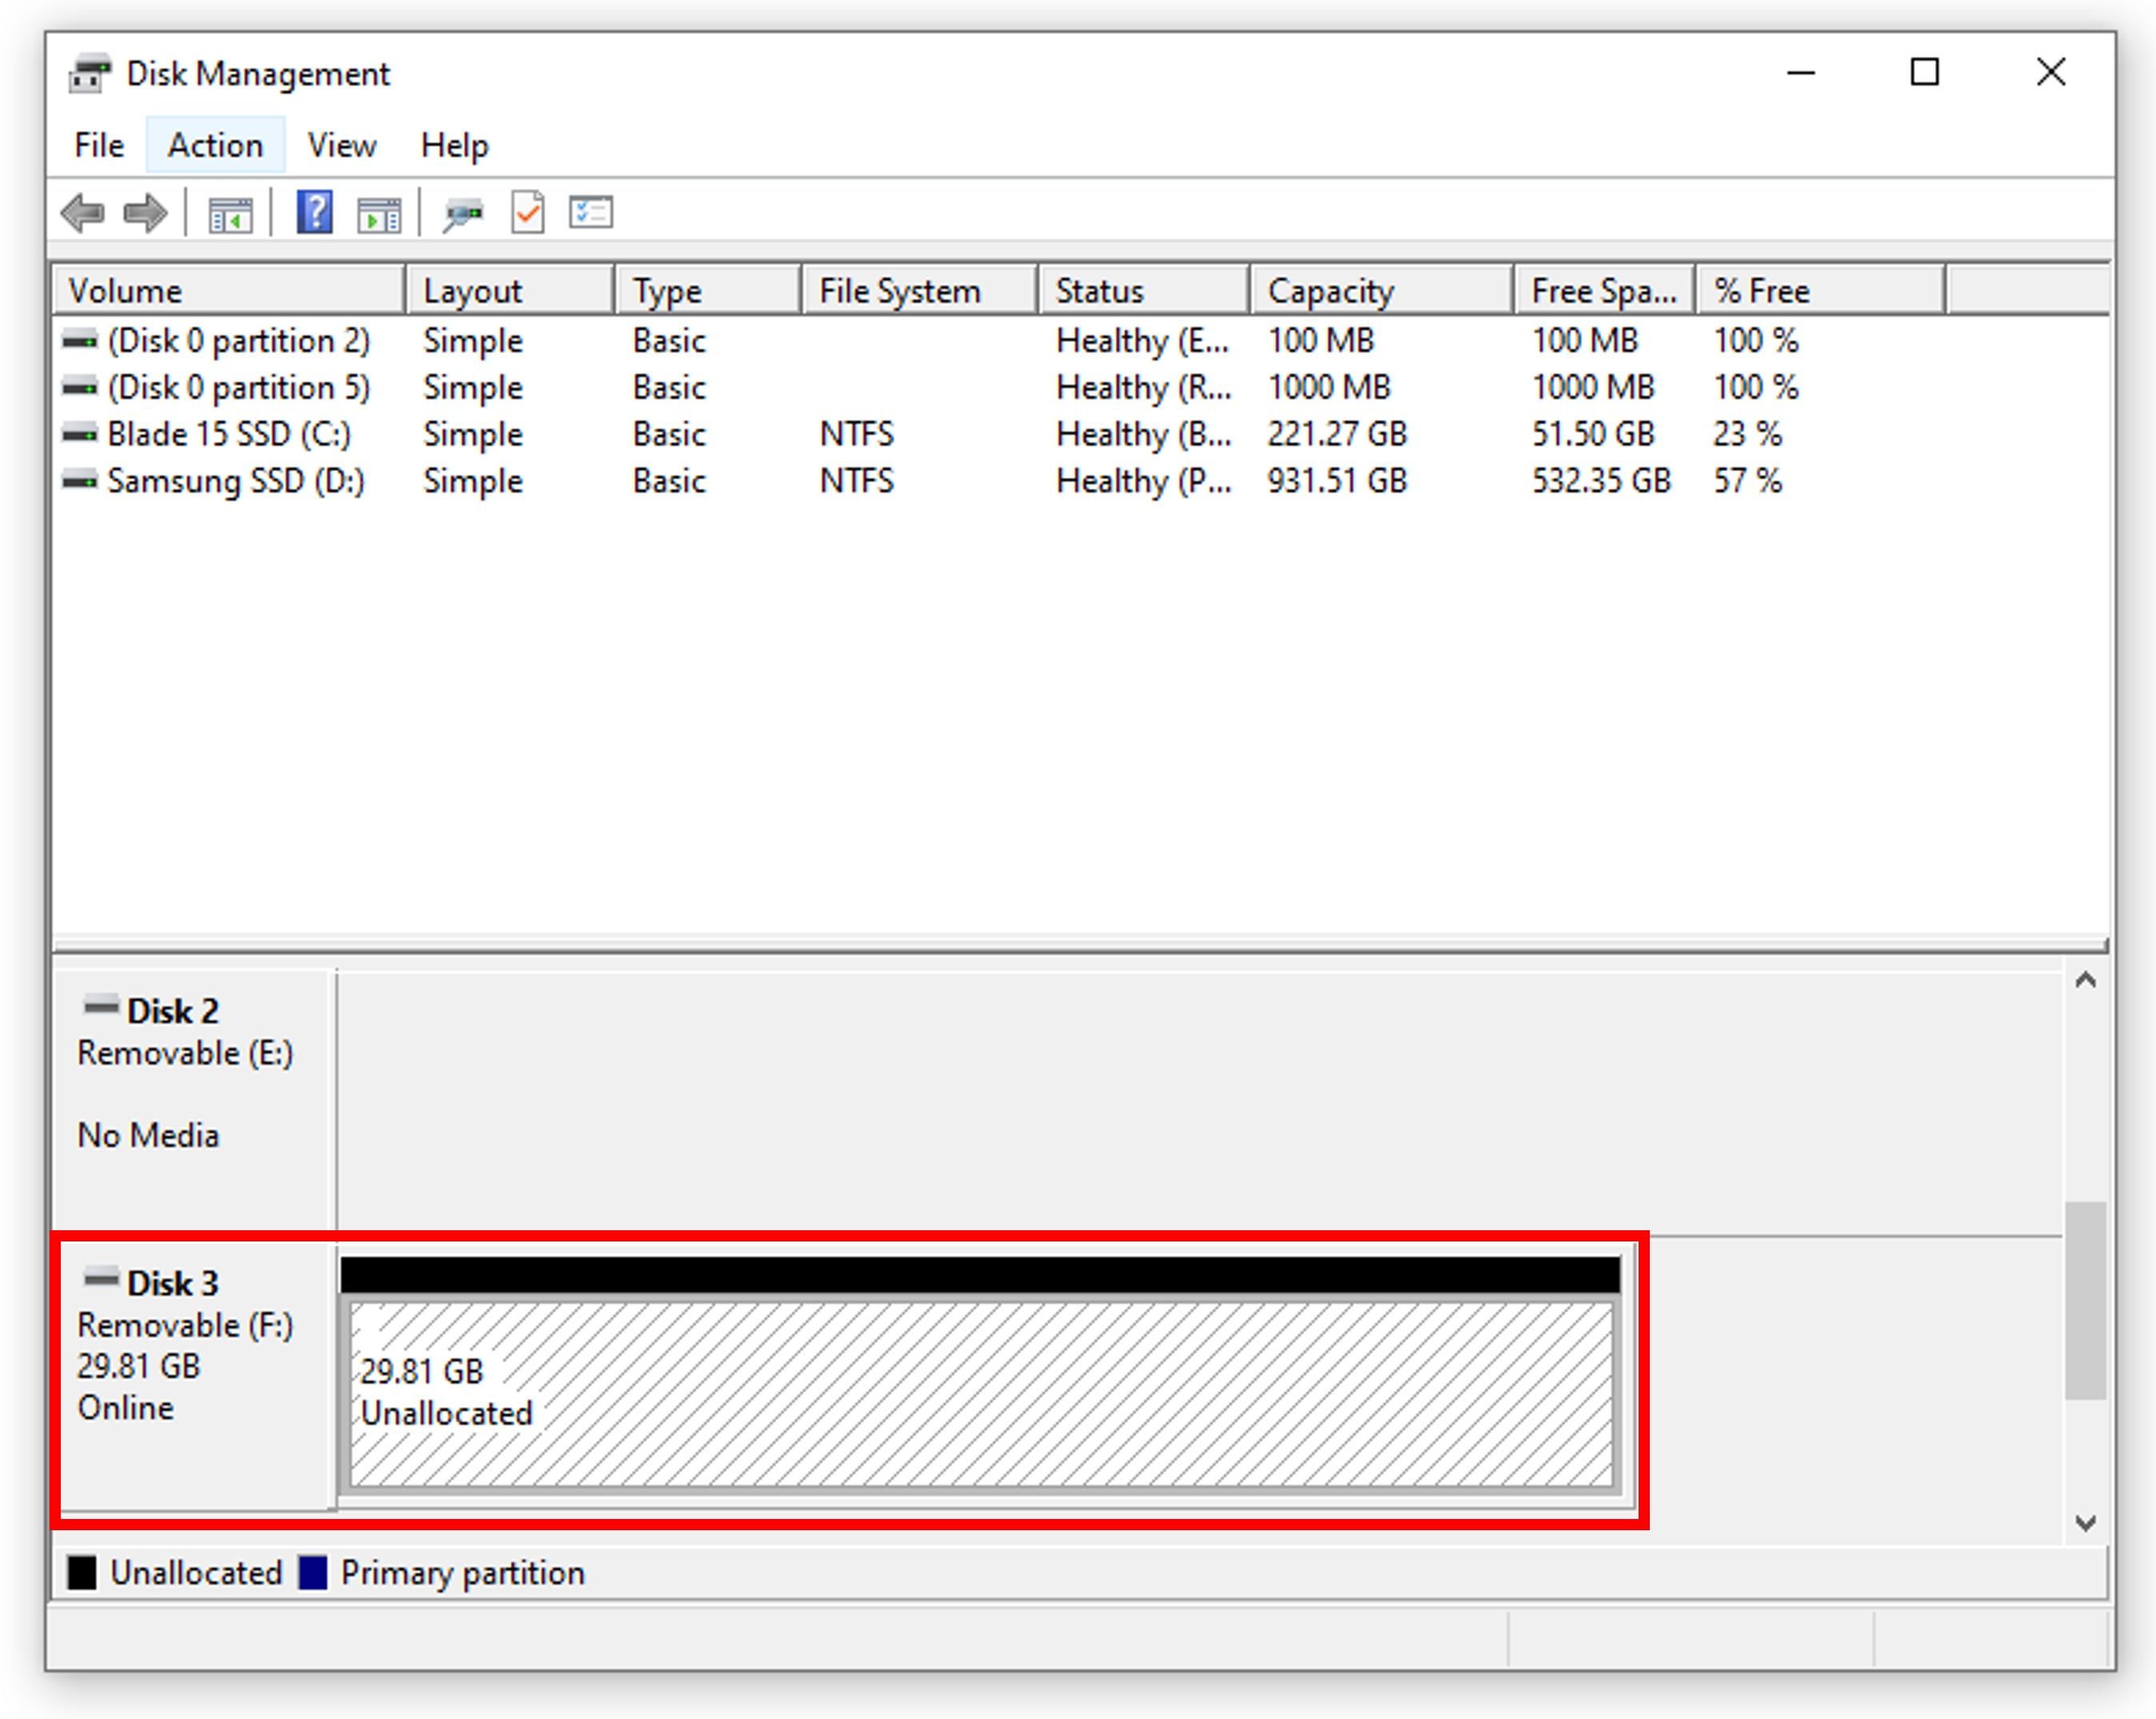 Disk Management window showing a detected microSD card
 - Update USB drivers in Device Manager.
- Right-click the Windows logo, then find Device Manager.
- Type
Device Managerin the search bar.
 Device Manager window instructing to “update driver”
 - Try a different SD card mount or slot, or use another computer with an SD card slot on the mainboard. Some reports suggest that USB 3.0 may not detect microSD cards.
If the SD card does not appear in Device Manager, it might be a physical issue.
E.2. Unable to complete formatting the microSD card
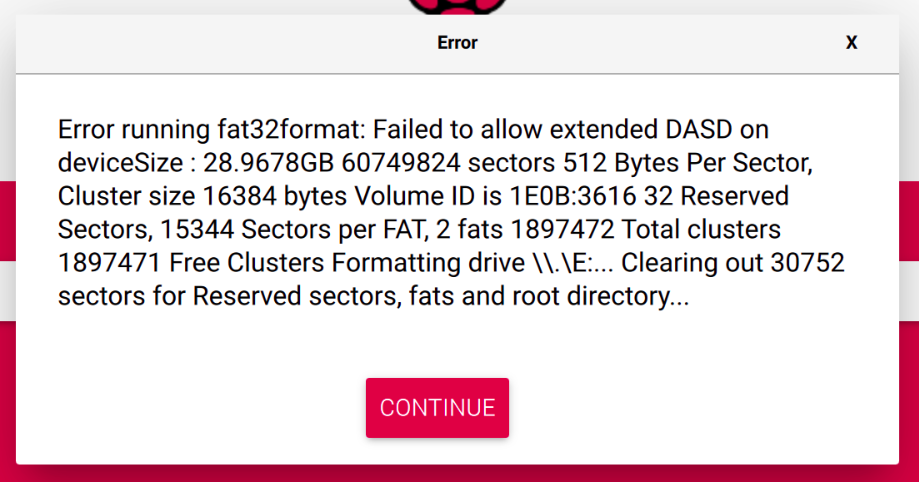 Raspberry Pi Imager formatter error
This issue may occur due to several reasons. Here are three methods to complete formatting the microSD card into FAT32.
E.2.1. Using Windows default formatter
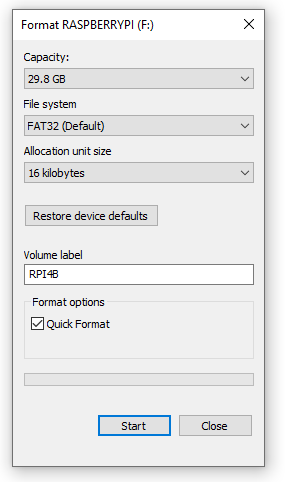 Drive Formatter on Windows 10
There are two different methods to format the SD card depending on its size.
For an SD card of 32GB or less, labeled as SDHC, use the Windows default drive formatter:
- Right-click the SD card drive under
This PC. - Select “Format”.
- Leave configurations as default but set “File system” to “FAT32”. You may name your volume label. Check “Quick Format”.
- Click “Start” to begin formatting.
For SD cards larger than 32GB, labeled as SDXC, use a third-party SD card formatter, as the default Windows 10 formatter cannot handle it.
SD Card Formatter from SD Card Association: https://www.sdcard.org/downloads/formatter/
If you experience issues with formatting, please see Section E.2.2 or E.2.3.
E.2.2. Using diskpart.exe for advanced formatting
 Windows formatter error
If the SD card is corrupted or has not been used for a long time, formatting may fail. Try using advanced options with diskpart.exe.
- Type
diskpartin the search bar or in Command Prompt to open diskpart.exe. - Type
list diskto see if the SD card is detected. - Type
select disk {number}to select the SD card drive. - Type
cleanto erase all data on the card. - Type
list volume. - Type
select volume {number}to select the volume you want to install the OS. - Type
create primary partitionto create partition 1 on the volume. - Type
format fs=FAT32 quickto format the card in FAT32 format as a “quick format.” This sets the maximum size for the card. - Once formatting is complete, type
exitto close diskpart.exe.
E.2.3. Using Disk Management to utilize formatting wizard
If the SD card cannot create a partition on the selected volume, use this method to reinstall the volume.
This is the most effective method to resolve the formatting issue.
- Open Disk Management to view the list of disks.
- Right-click any volume on the selected microSD card disk.
- Delete all volumes on the disk.
- Right-click “Unallocated” volume.
Select “New Simple Volume” to start the “New Simple Volume Wizard.”
 Disk Management window to create a “New Simple Volume” on the “Unallocated” volume
- Type the maximum disk space in MB in “Simple volume size in MB” (usually set by default).
- Select your preferred drive letter.
- Select “Format this volume with the following settings”.
- File system: FAT32
- Allocation unit size: Default
- Check Perform a quick format.
Complete the wizard, then check if the card is correctly formatted.
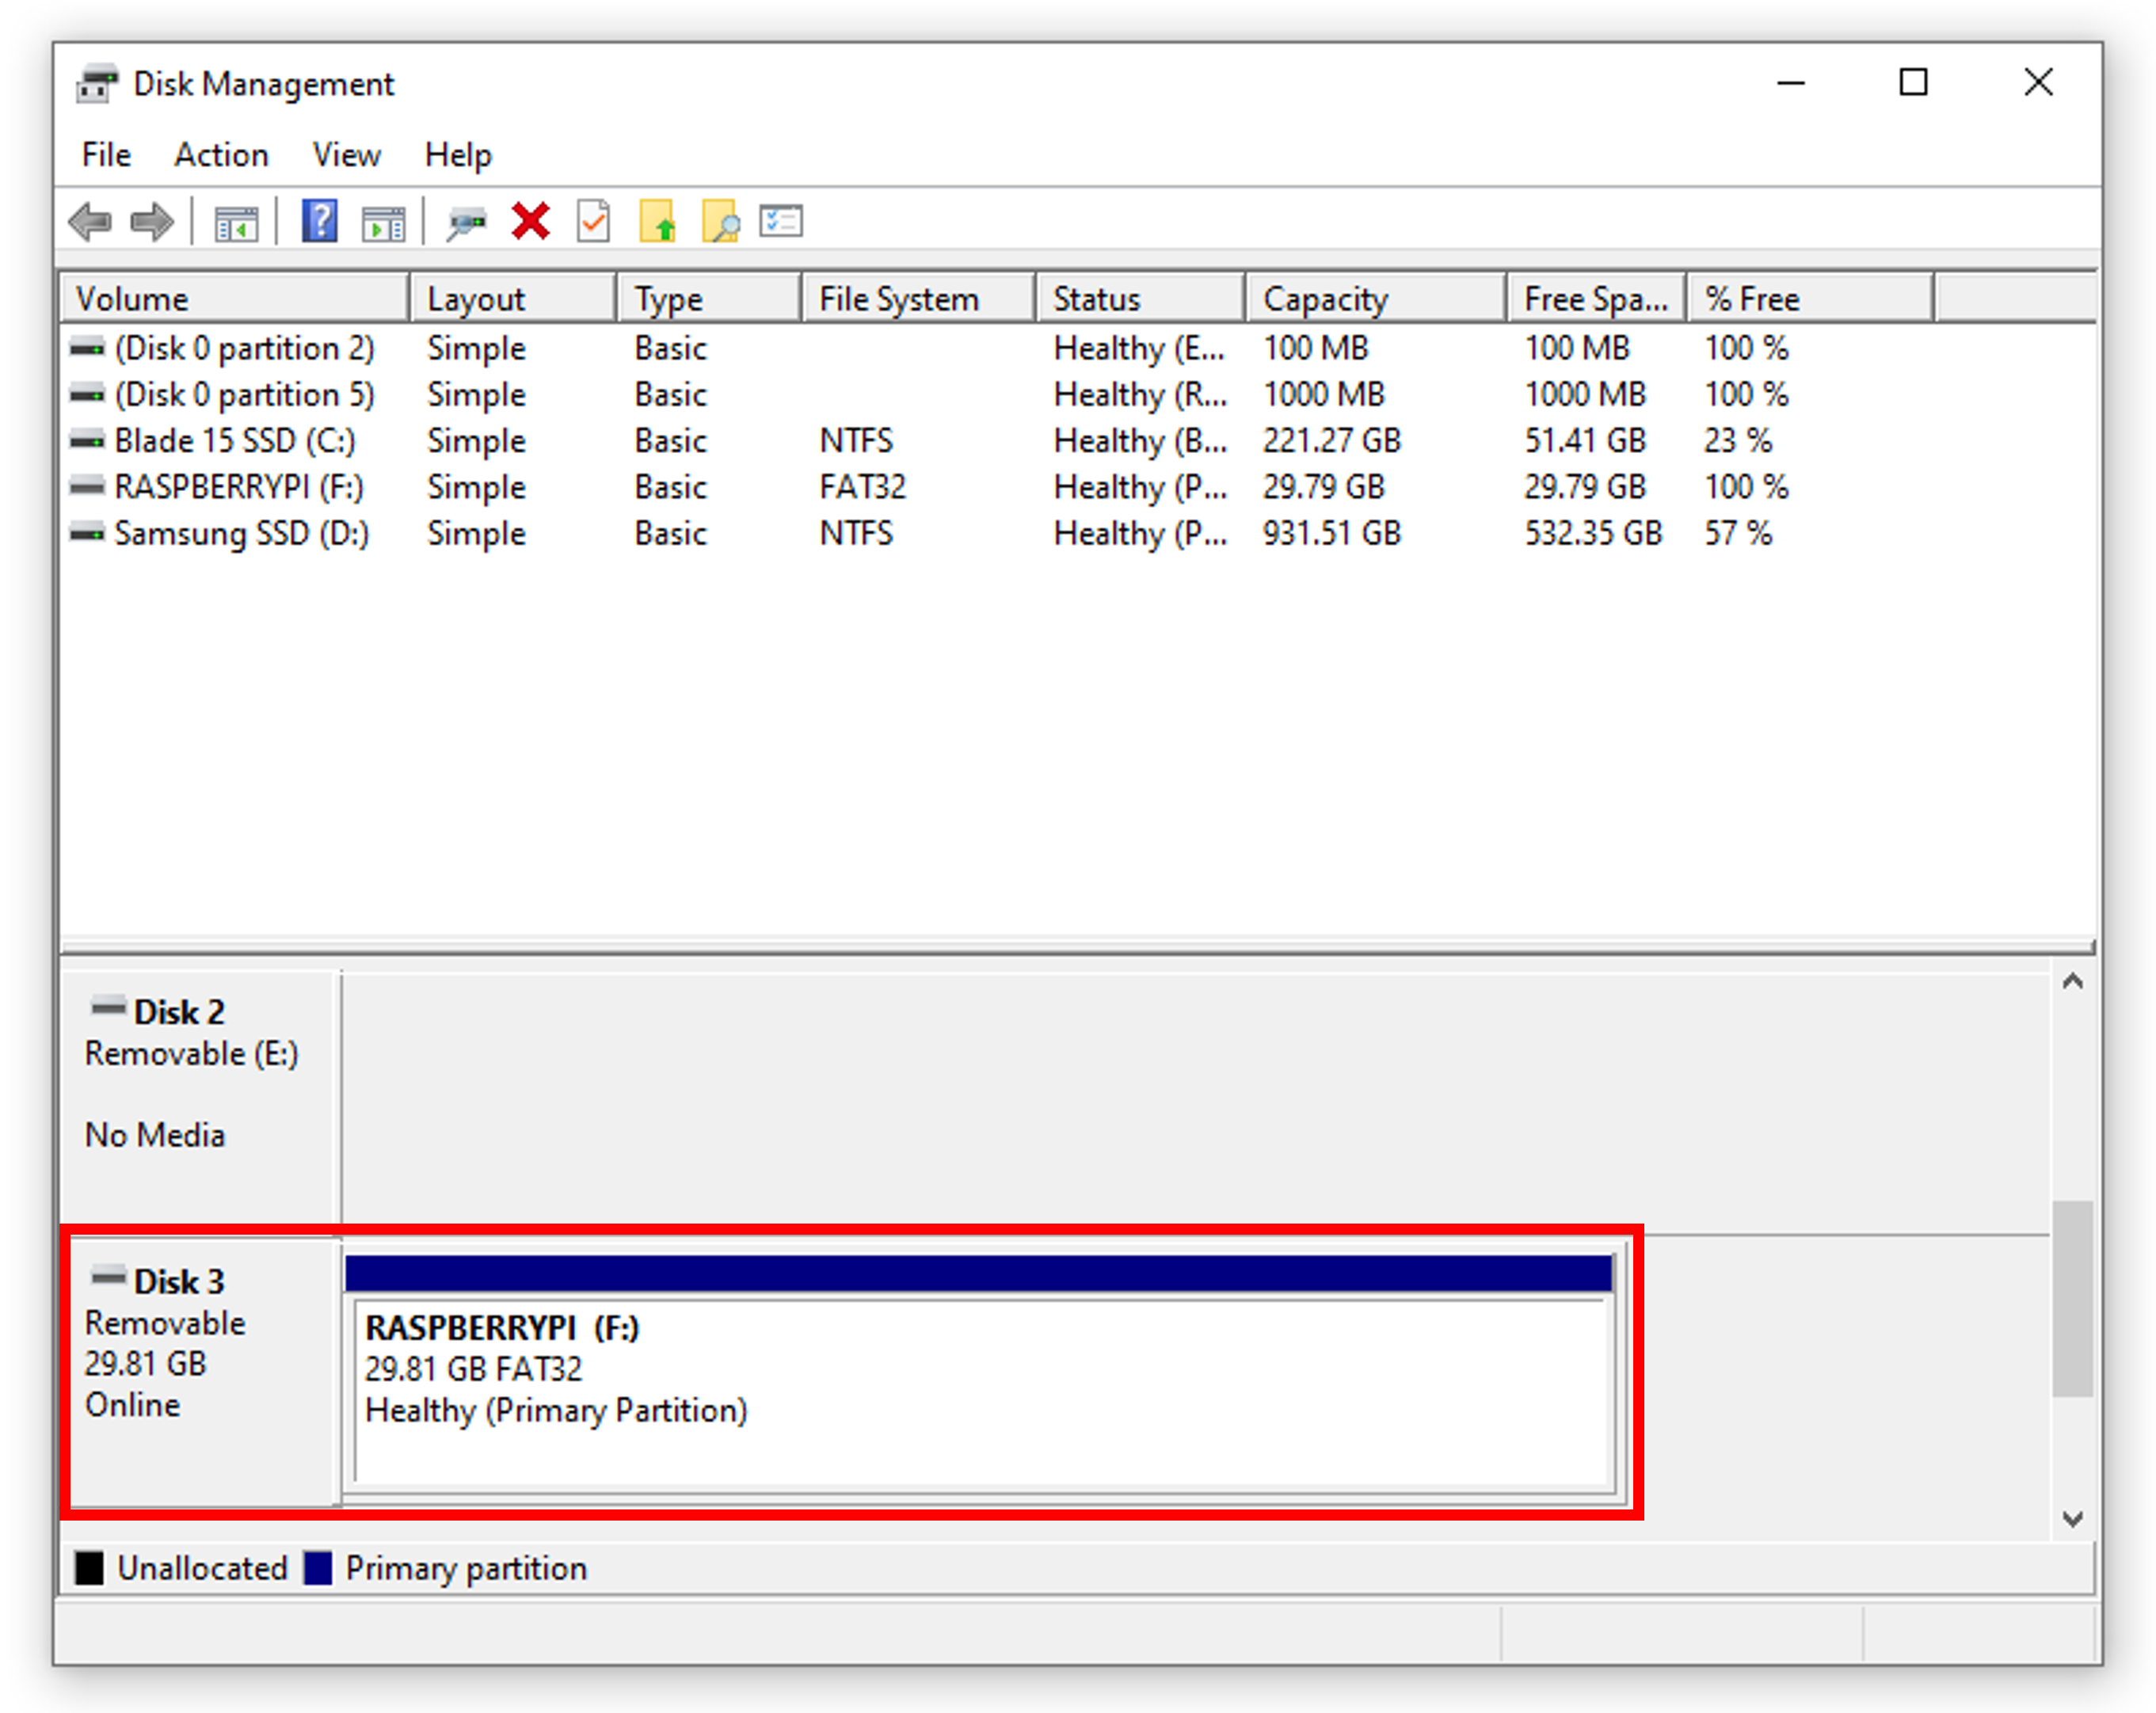 Disk Management window after formatting is completed